

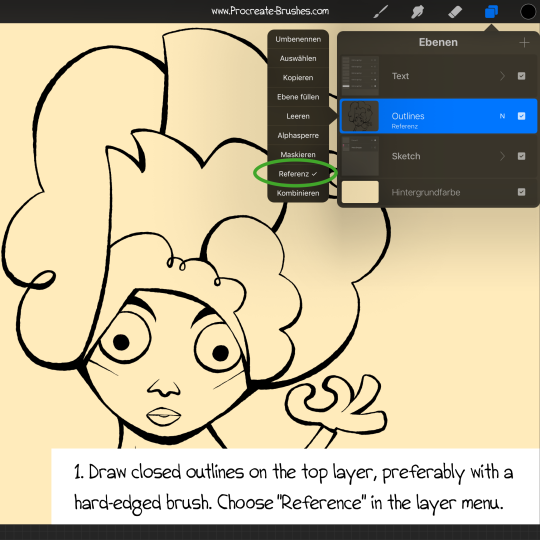
Illustration & Shape Painting Tutorial for Procreate 4
For the upcoming MegaPack BrushBook, I tried a new style with my new DUNCE Comic Brushes:
- DUNCE INK Streamline for outlines
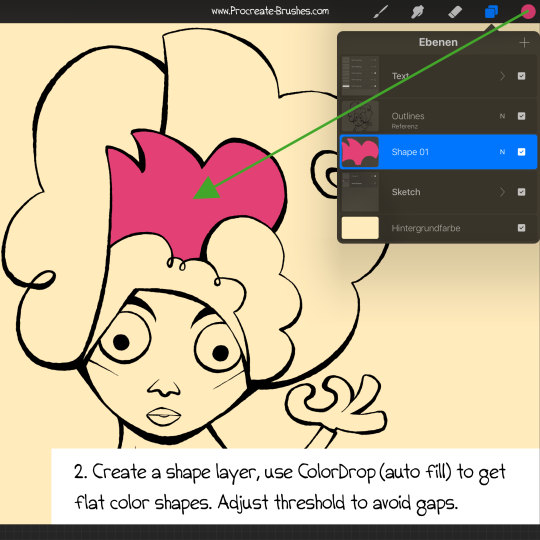
- ColorDrop (auto-fill feature) for flat colors and shapes
- DUNCE SPRAY Black for highlights, shading, and background
Since I used the “Shape Painting” technique a lot for this illustration, I made a simple step-by-step tutorial you might find useful:
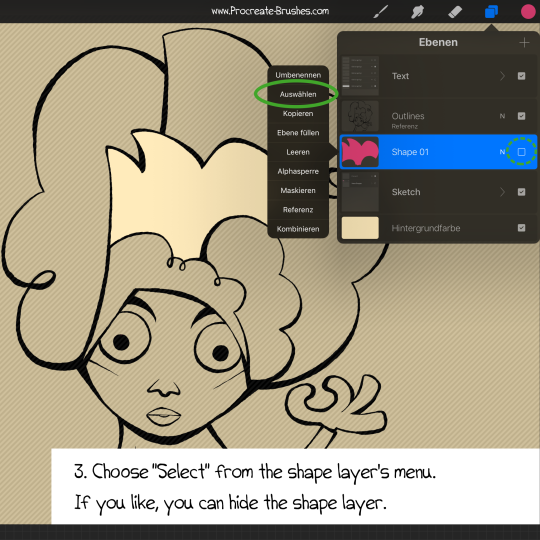
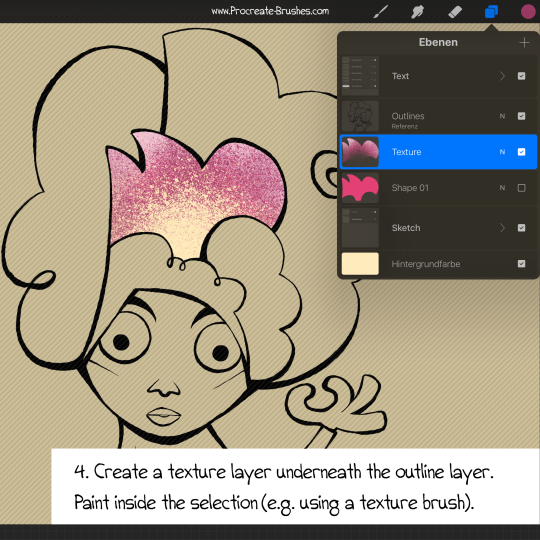
How To Use Outline Reference, Layer Selection & Alpha Lock for Shape Painting
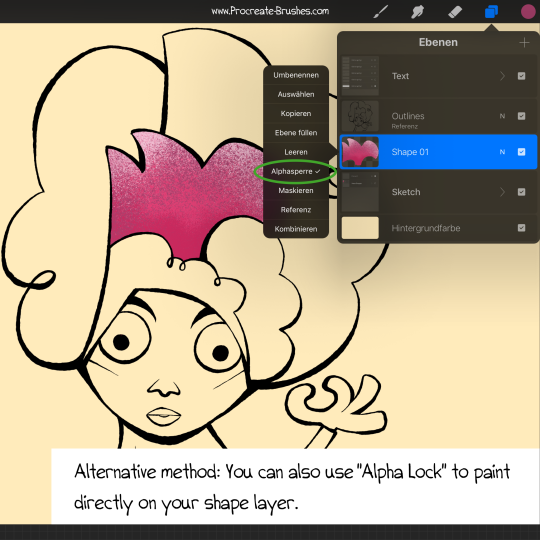
“Alpha Lock” Is Your Friend!
Since working with (multiple) layer selections can be a bit confusing and time-consuming, you can also use “Alpha Lock” for painting directly on your shape layer:
If you enjoy this kind of mini-tutorials, I’ll be happy to make more in the future!
Happy Shape Painting! 😎
–Georg
Original art: Jonathan Edwards